Maybe you’re a homeowner who purchased a barn conversion that was done years ago and want to improve its comfort and efficiency without breaking the bank. Or perhaps you’re a self-builder, planning your barn conversion on a tight budget and need to make every penny count. In either case, cost-effective retrofit strategies will be your best friend. Retrofitting refers to making upgrades to an existing structure – in this context, implementing improvements in an existing barn conversion (or during the conversion process) to enhance energy efficiency, comfort, and functionality in a budget-conscious way.
The good news is that many energy-saving measures also save you money in the long run by reducing utility bills. It is more cost-effective to save energy than generate it.
This means, invest in insulation and efficiency first, before fancy tech. Here, we’ll outline practical, cost-effective strategies to retrofit or upgrade your barn conversion. These range from quick wins to more involved projects, but all with an eye on maximising bang for buck.

Start with an Energy Audit (Know Your Barn)
Before swinging hammers or ordering materials, take stock of the barn conversion’s current performance. If you already live there, you might have an intuitive sense (drafty corners, a room that’s always colder, etc.). If not, consider an energy audit: some professionals offer assessments, or you can DIY by checking insulation levels, looking for gaps, and maybe using tools like a thermal camera (some smartphone attachments or local energy companies lend them out) to see where heat is leaking.
Key things to identify:
How much insulation is currently in the roof, walls, and floor? (E.g., lift a loft hatch – is there insulation? Drill a tiny hole in a plasterboard wall in an inconspicuous spot – see if insulation present.)
Are there obvious drafts? On a windy day, check around window frames, external doors, and any pipe penetrations. You might feel cold air or see cobwebs moving (spiders love making webs where there’s airflow).
What is the state of the windows and doors? Are they double-glazed or old single panes? Do they shut tightly?
Heating system efficiency: Is there an old boiler guzzling oil or old electric heaters? Controls: Do you have a thermostat and zones or just a single dial?
Any damp spots or condensation? That could indicate insulation or ventilation issues. For example, condensation on a high ceiling might mean warm moist air is reaching a cold roof – perhaps insulation is lacking or extractor fans aren’t sufficient.
This audit will help prioritise. A rule of thumb for cost-effectiveness is to address the biggest sources of heat loss and discomfort first (often roof and drafts), as those give quick payback.

Improve Insulation Where Feasible
Insulation is usually the top retrofit improvement for both comfort and cost savings. If your barn conversion was done to older standards (say 1990s or early 2000s), it might have minimal insulation by today’s standards. We have a stand-alone article on all things best practice barn conversion insulation strategies here. Here is an overview of things to check:
Loft or Roof Insulation:
This is typically the easiest place to add insulation. If there’s an accessible loft space, top it up with more mineral wool – going from, for example, 100mm to 300mm can dramatically cut heat loss and isn’t very expensive. Just be careful not to trap moisture – use breathable insulation if adding on top of an existing insulated roof. But generally, more = better in roof insulation. It’s cheap and immediately effective.
Wall Insulation:
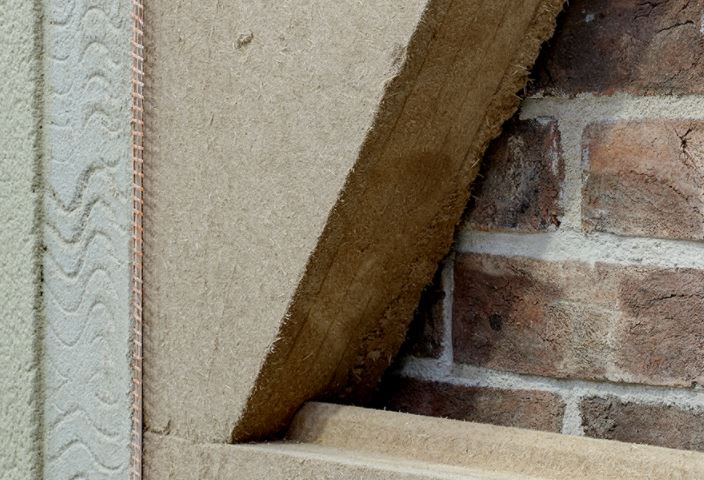
Walls are trickier but still doable. If you have exposed masonry inside and it’s chilly, consider adding insulation to that wall in a reversible way. Sometimes, adding even a thin layer (say 10mm aerogel wall boards) on the interior and re-plastering can boost warmth notably. If you’re willing to do larger works, externally insulating might be an option – but that tends to be costly and change appearance, so not always the first choice in a retrofit unless major improvements are needed.
Target walls that are causing problems: if one side of the house faces driving rain and is always cold, maybe that one gets insulated internally. Remember, even adding a little insulation can make a difference, and you can do it room by room if needed.

Floor Insulation:
Many older conversions didn’t insulate floors, especially if they kept an existing slab. Cold floors can be mitigated without ripping everything up: one cost-effective trick if you have floorboards – you can sometimes blow insulation for intermediate floors or install rigid boards between joists.
If it’s a solid slab and you can’t add insulation beneath, consider insulated underlay and a new flooring on top (be mindful of thresholds and door heights). There are products like insulated laminate underlay or even thin thermal boards that can go under carpet or wood flooring. They won’t match the performance of thick under-slab insulation, but they can take the edge off a cold floor. Even large rugs or carpet can help (not a reg solution, but a pragmatic one for comfort).
One caution: as you improve insulation, maintain ventilation to avoid trapping moisture. This might mean adding trickle vents or using a dehumidifier until you can improve the ventilation system.

Seal the Drafts: Improve Airtightness on a Budget
One of the most cost-effective improvements is draft-proofing. It’s not glamorous, but it works. Materials like weatherstripping tape and door sweeps are inexpensive and DIY-friendly. I’d say avoid expanding foam where you can as this can degrade overtime.
Here’s a quick checklist for draft-busting:
Windows & Doors: Install or replace weatherstripping around frames. Barn conversion doors, especially if original, might have big gaps – consider adding a draft excluder strip on the frame and a brush or sweep on the bottom of the door. If the barn doors were decorative and there’s a new inner door, ensure the decorative ones don’t funnel wind in. For sash or casement windows, stick-on foam or rubber seals can drastically cut cold air ingress. Also check the meeting rail (where two doors meet or window sashes meet) – there are special seals for those too.
Loft Hatches: If you have an attic hatch, insulate its back and put self-adhesive foam tape around the edges so it closes tight. You can also use an old pillow or insulation batt on top of it as a quick fix (just don’t forget it’s there when you open it).
Service Penetrations: Go into each room and look under sinks (pipe exits), around extractor fans, wiring holes, etc. Often builders cut a hole and don’t fully seal it. Use airtight window tape to close those gaps. Check around the boiler flue, around incoming water mains, etc. The utility room or plant room often has big gaps around pipes. If your sealing pipes that get hot it’s required to use aluminium heat-resistant tape. Sealing these not only stops drafts but can also keep spiders out.
Beams and Eaves: In some barn conversions, you have exposed beams or rafters going through walls or ceilings. Those can be leaky around the edges. Use a airtight and windtight tape around the beam penetrations.
Unused Chimneys or Vents: If you have a fireplace that’s purely ornamental and not used, consider an inflatable chimney balloon or some sort of temporary seal inside the flue (just remember to remove if you ever use it!). Old ventilation grates that aren’t needed because you now have modern systems could be closed off.
These small actions can add up to a significant reduction in heat loss. The house will feel less “chilly” and you might find you can lower the thermostat a notch and feel the same comfort, thus saving on bills. A well-sealed home also keeps out dust to an extent and is quieter (great for those that suffer from hayfever!)

Ventilation and Moisture Management on a Budget
As we tighten up insulation and drafts, we must keep ventilation in mind to avoid condensation. If a full MVHR is not in the cards financially, there are still retrofit measures:
Trickle vents can be retrofitted to some windows (it involves cutting a slot in the frame or adding a vent piece). This is fairly low cost and keeps some background air flow without major heat loss.
Consider a positive input ventilation (PIV) unit – these are simpler than MVHR: typically installed in the loft, they gently blow filtered air into the house, creating a slight positive pressure that pushes stale air out through leaks. They help with condensation and are cheaper than full ducted systems. They do lose some heat since they bring in outside air, but some have optional heaters for winter to temper the air a bit.
Use extract fans with humidity sensors in bathrooms, so they automatically run when needed and turn off when dry – ensures you only spend electricity when necessary. If your current bathroom fans are old and noisy, upgrading to efficient, quiet models will encourage their use (people often avoid using loud fans, defeating the purpose).
On a lifestyle note: use lids on pots when cooking, dry clothes outside or use a vented dryer (or condensing dryer with a drain) – moisture from these activities can otherwise add to condensation load.
The cost-effective principle here is to remove moisture at the source (with good local extraction) and allow just enough background air in to keep the home fresh. If you find after insulation that condensation is showing up on windows in the morning, increase ventilation a bit (open trickle vents or a window briefly). It’s a balancing act but doesn’t have to be expensive.
Phasing your retrofit
Phasing ensures you spread cost and also learn from each step (maybe after insulating roof and sealing drafts you find the heating system is coping much better, so you delay that boiler replacement another year).
Also keep an eye out for grants or incentives. The UK has periodically offered schemes for insulation or heating upgrades (like the past Green Homes Grant, or current Boiler Upgrade Scheme for heat pumps, or Energy Company Obligation (ECO) for insulation if you qualify). Check with local council or government websites; if there’s a subsidy available, grabbing it will improve the cost-effectiveness dramatically.
Conclusion
Retrofit is not just about cutting energy use; it’s also about improving your day-to-day comfort. Many cost-effective measures, like sealing drafts and insulating well, will make the barn conversion much more pleasant to live in – warmer in winter, cooler in summer, and with fewer cold spots or musty damp areas. It’s a win-win: a comfortable barn is likely an efficient barn.
As you implement these strategies, you should notice the difference: less cycling of the heating, more stable temperatures, and likely a drop in your heating bills. Even small changes can add up – perhaps you save 15% on heating from draft-proofing and another 20% from insulation upgrades and then maybe 10% from tweaking heating controls. Suddenly you’re using, say, 30-40% less energy than before – that’s significant over a year in a big space.
While many retrofit steps are DIY-friendly, don’t hesitate to seek advice if unsure – especially when dealing with insulation in older structures (to avoid moisture issues) or upgrading heating systems. You don’t necessarily need to hire big studies; sometimes a consultation with an energy advisor or a quick chat with us as your architect and interior designer can set you on the right path.

About the Author
Email: design@zahrada.co.uk
Phone: +44 01962 453990
ZAHRADA is led by Tim Willment, an ARB-registered Architect. He is supported by his wife Zofia, an Architectural & BIID-registered Interior Designer.
We’ve built a design practice that is small, intimate and approachable. We have a particular fondness for breathing new life into old and forgotten spaces.


